
Advanced Usage
Unsure about how to use a specific feature of Stratos? This guide will go over some of the more advanced features of the product and how to use them.
# Server Operations
Stratos is designed to be as easy as possible to make a server for your favorite game and share it with your friends. However, we also want to give you the ability to customize your server to your liking. This next section will go in-depth on how to do that.
# Configuring your server
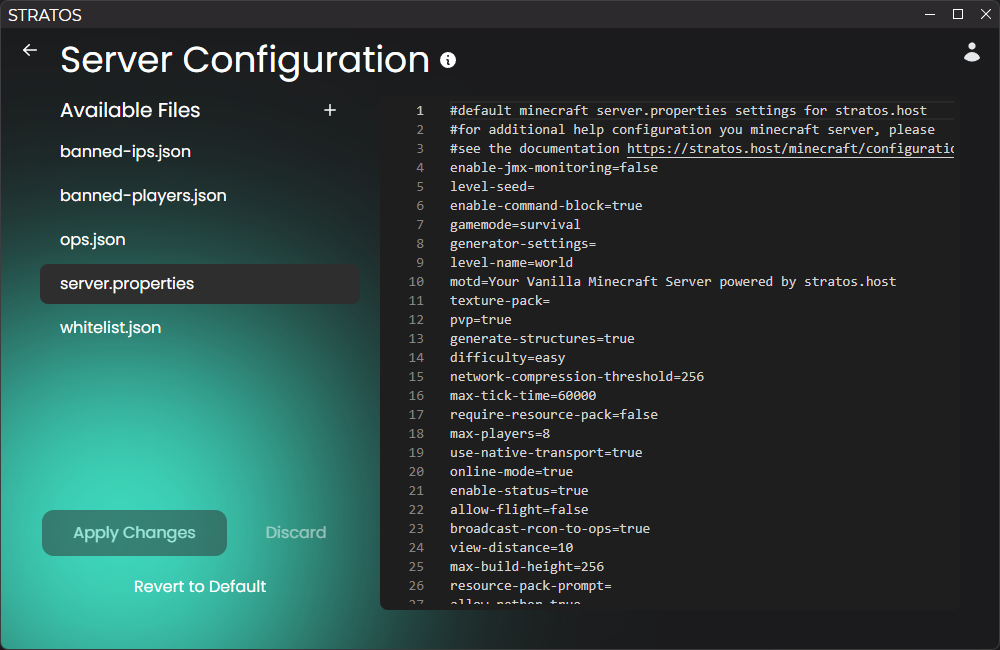
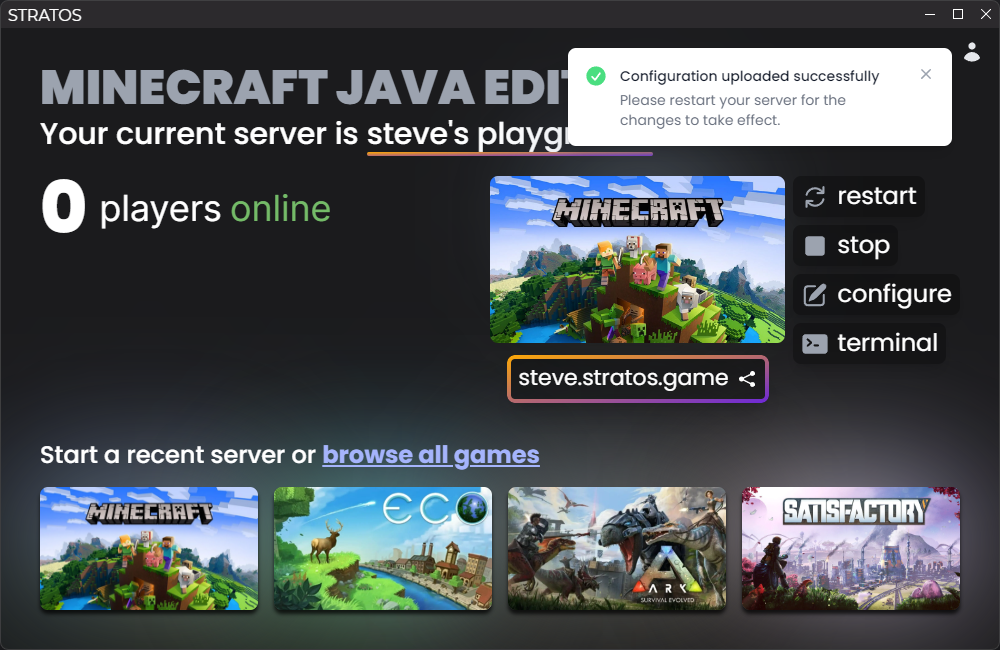
Don't like the default settings for your server? You can change them by clicking on the "configure" button on the right side of the home screen, on the "My Servers" screen, or in the server modal. This will bring you to our configuration page where you will see a list of files on the left side and the contents of the selected file on the right side. You can make changes to any of the files, add/delete files, or revert to the default configuration for your server and then click the "Apply Changes" button to save your changes. After doing so, you will be brought back to the home screen and will see a notification in the top right that you need to restart your server for the changes to take effect.
Click to view example images
Home screen with configure button: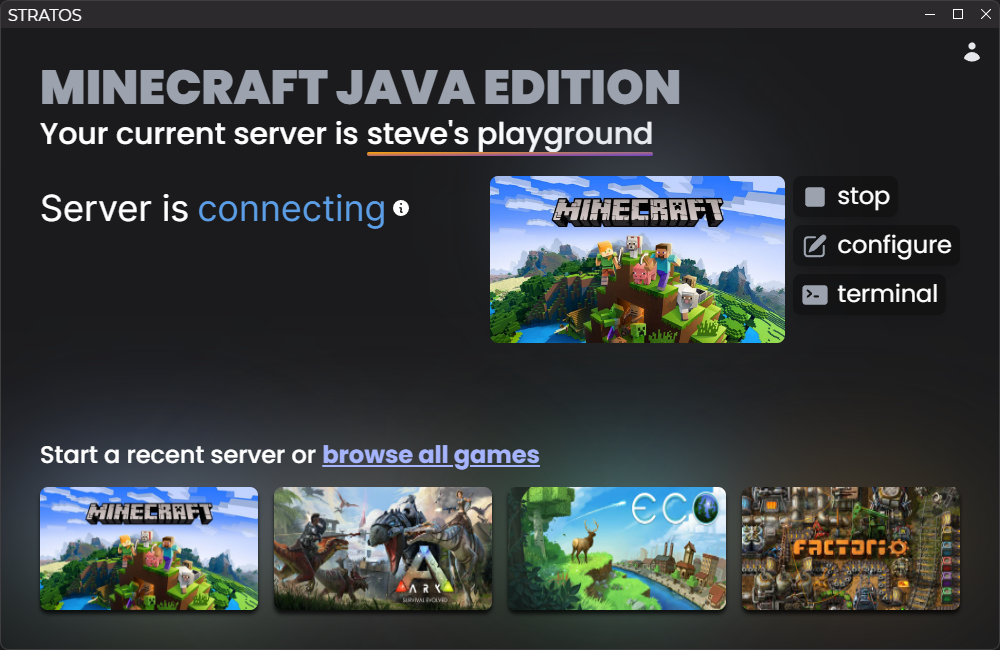
# Accessing the console
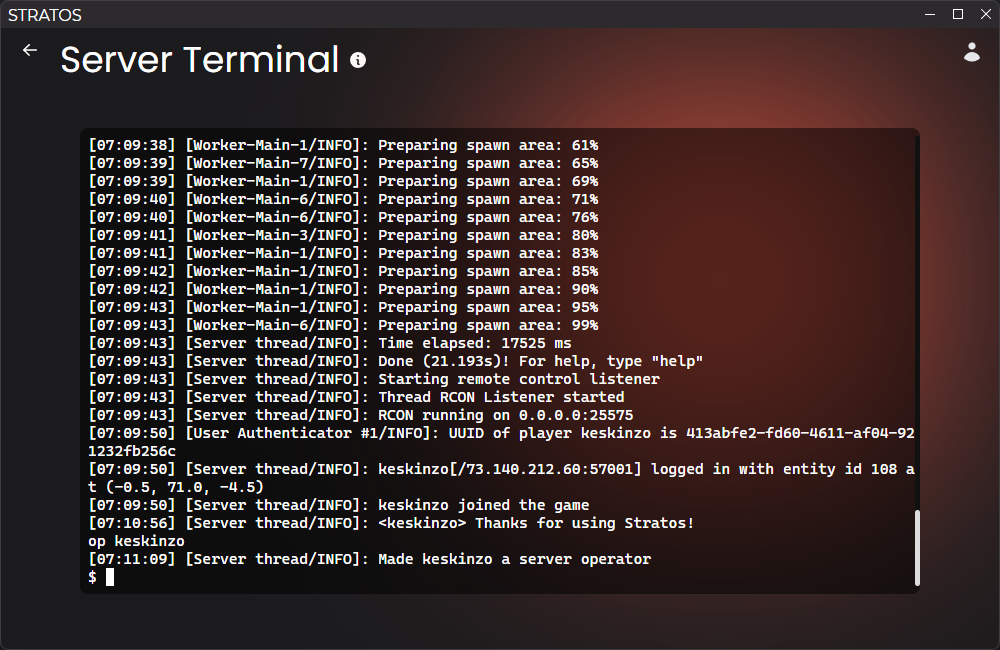
A big part of running a server is being able to see recent activity, run administrative commands, and troubleshoot issues in the server's console. When you are on the home screen and your server is connecting or online, you will see a button on the right side of the screen that says "terminal". Clicking on this button will open the console for your server.
Some games do not support user input in the console and are purely for observing the server's output.
Click to view example images
Home screen with terminal button:
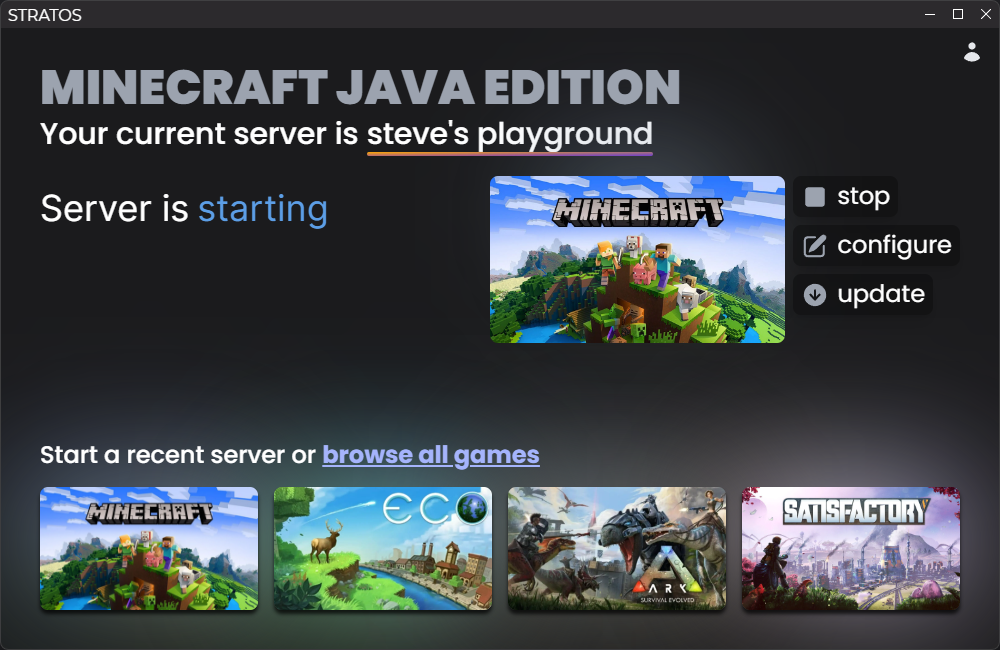
# Updating your server
Most games do not allow you to choose a specific version of the game to play on which means that if your server is not running the latest version of the game, you will not be able to connect to it. We automatically detect the latest version of our games and prompt you to update your server when it is out of date with a button on the right side of the home screen.
Please note that updating your server will cause it to restart. Be sure to warn any players on your server before doing so.
Click to view example image
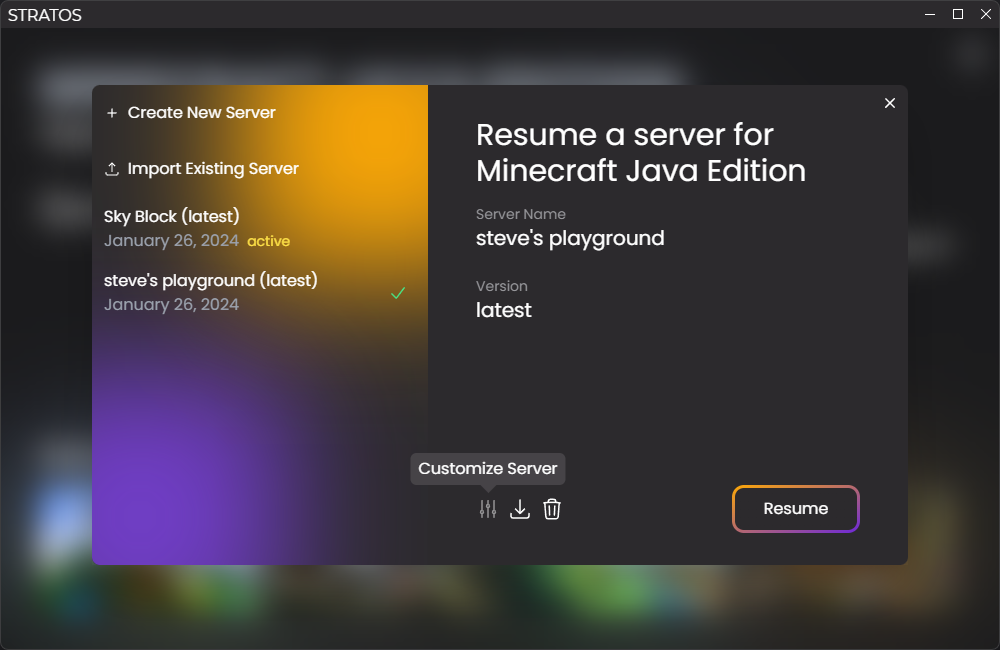
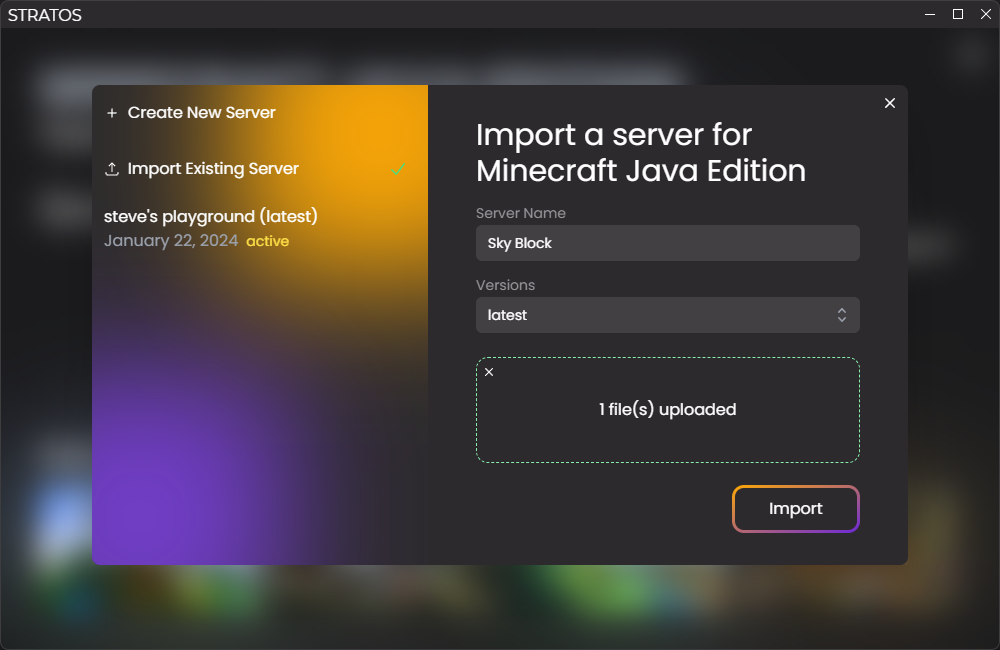
# Importing an existing server
Got a server you'd like to bring with you into Stratos? No problem! A guide for each game will be coming soon, but you can generally follow these steps:
- Click on the game you'd like to import the server for from the home screen or the "browse games" screen to open up the modal for that game.
- Click on the "Import Existing Server" button on the left side of the modal.
- Enter your server name and specified version (latest is usually what you want).
- Import your server files by clicking on the "Select server files" button or by dragging and dropping the files into the modal. You will notice that some games will require you to import the server files all in one folder and others will require you to import a separate folder for the save (data) files and configuration files.
- If you uploaded the wrong files, you can click on the "X" in the top left of the file to remove it and re-updload the correct file.
- Click the "Import" button to finish the process.
Click to view example images
Dragging folder to be imported: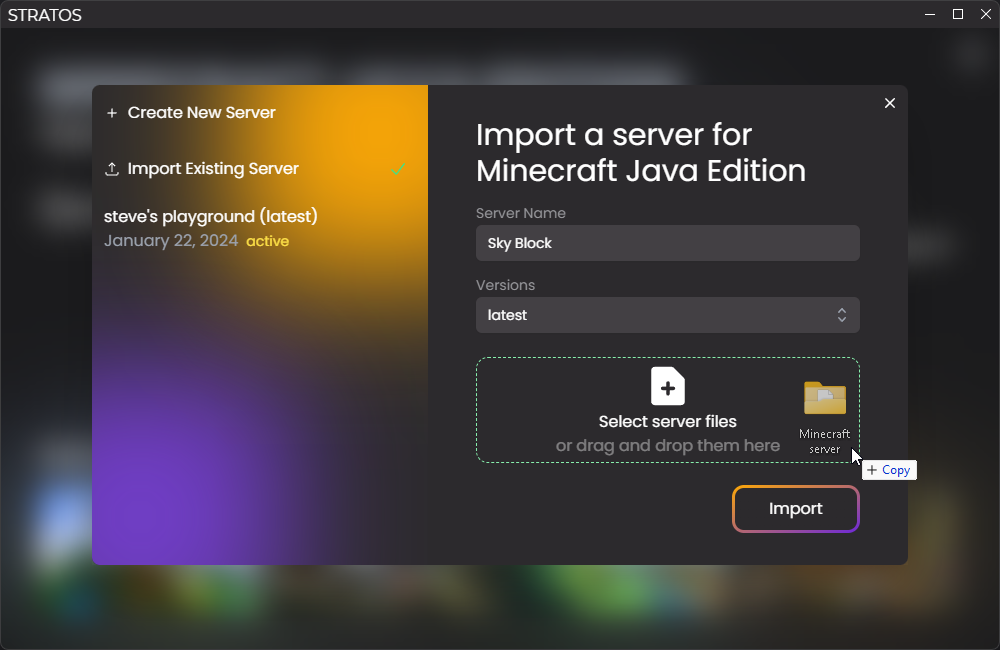
# Exporting your server
Exporting your server is super easy. Go to the "My Servers" screen or open the server modal by clicking on the server's game
and then click on the "Export Server" button for the server you want to export. This will prompt you to choose a location to
save the file which will be in the .zip format. You will notice that there will be two folders, one for data (usually the
world files) and one for the configuration files so you might need to move things around for it to work on your system.
Click to view example image
# Deleting your server
At the moment, you are only allowed to have 10 servers at a time. If you need to delete a server to make room for another, you can do so by opening the server modal for your server's game or by going to the "My Servers" screen and clicking on the "Delete" button.
Deleting a server is permanent and cannot be undone. Be sure to back up any important files before doing so.
Click to view example images
Server modal with delete button:
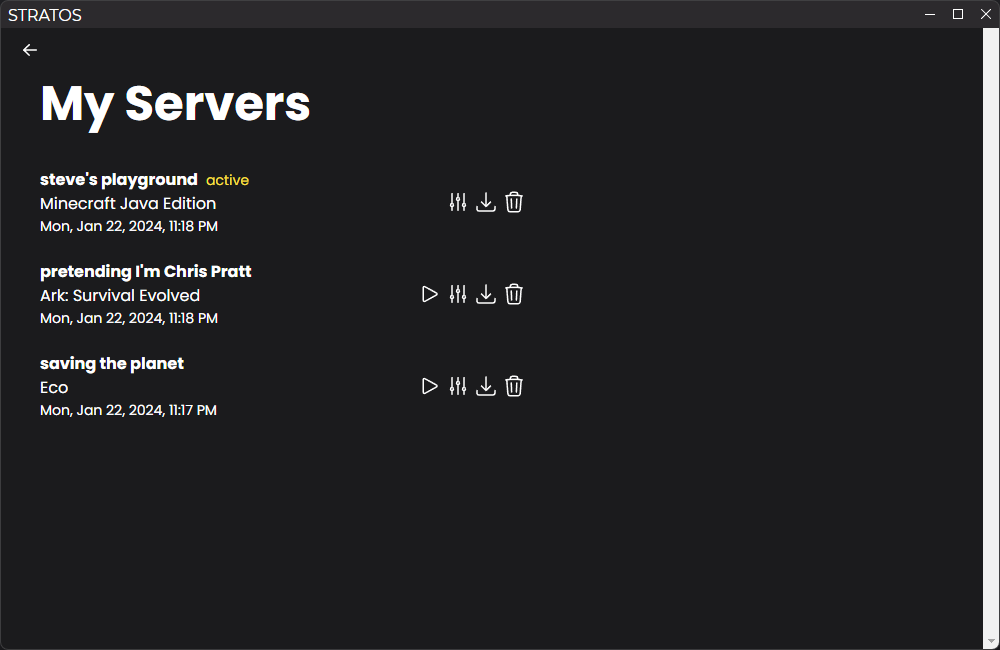
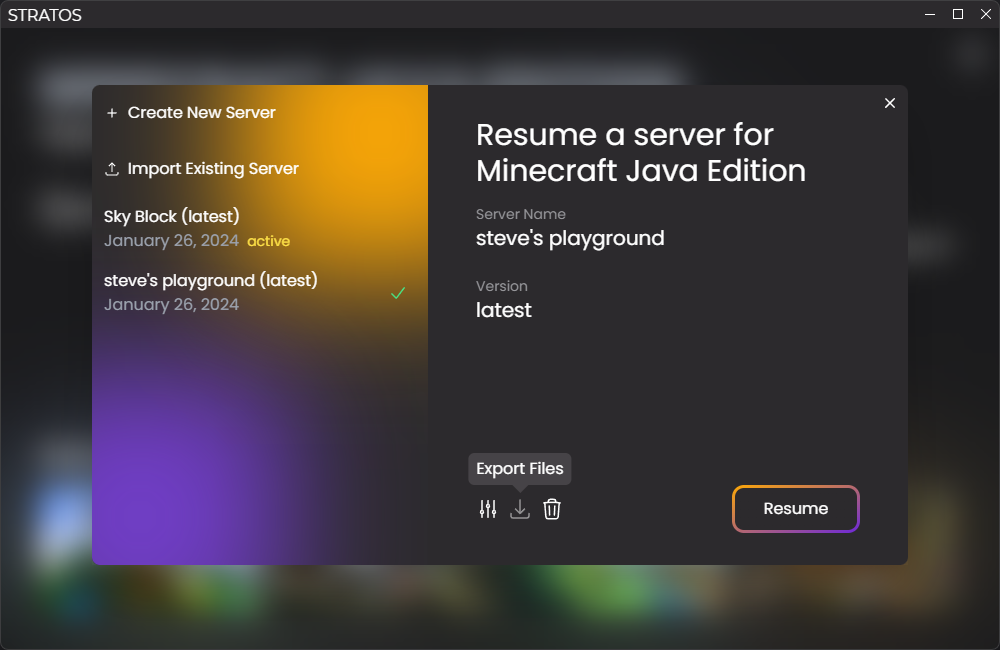
# See all servers
If you would like to see all of your servers in one place, you can click on the "My Servers" option in the profile dropdown in the top right corner of most screens. On this page, you will be able to start a different server than your active server, configure a server, export a server, or delete a server.
Click to view example image
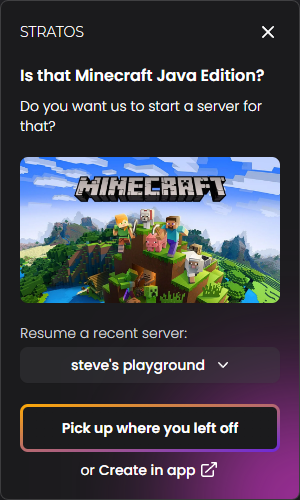
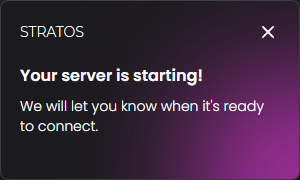
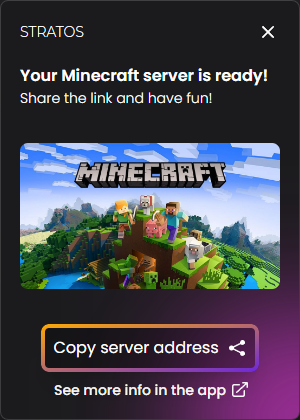
# Game notifications
When you launch a game supported by Stratos, you will see a notification in the bottom right corner of your screen. If your active server is different than the game being launched, you will be prompted to resume or create a server for that game. If your active server is the same as the game being launched, you will be able to copy your server URL to your clipboard for easy sharing. This notification can be disabled by unchecking the "Prompt on game startup" setting in the application settings.
Click to view example images
Resume/create a server:
Starting your server:
Ready to game:
# Changing Settings
At the top right of most screens in the application, you will see a profile icon. Clicking on this icon will open a dropdown menu with a few options. Clicking on the "Settings" option will take you to the settings page.
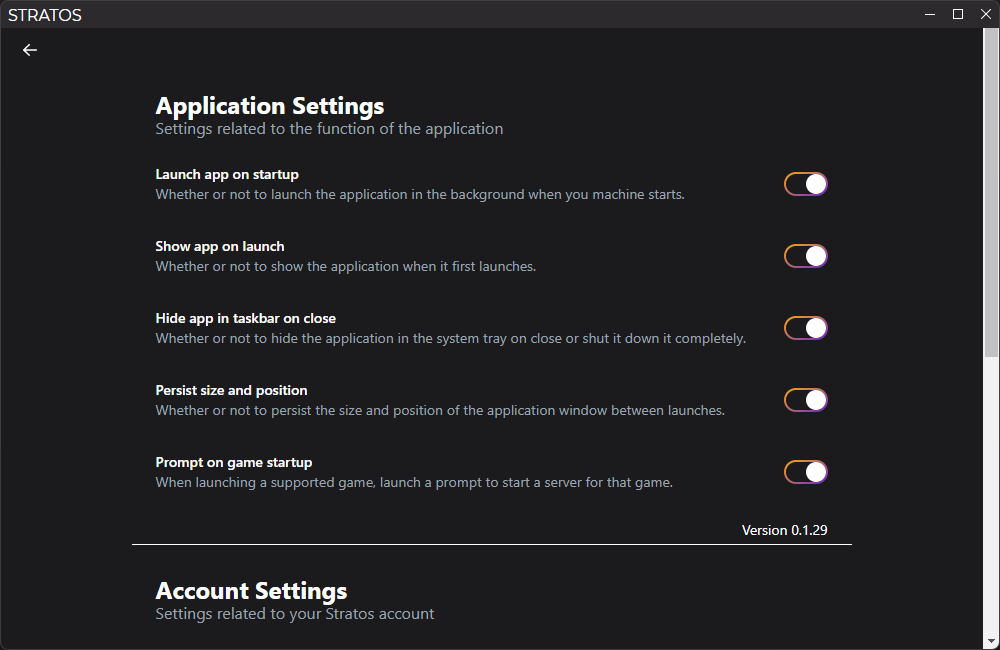
# Changing the Application Settings
The first section of the screen shows a few different settings that you can change. They have descriptions in the app, but here's a little more info about them:
- Launch app on startup: By default, the app will launch when you log in to your computer. Disabling this setting will prevent that from happening and will only launch the app when you open it manually.
- Show app on launch: By default, the app will show when you log in to your computer. The app will still launch when this is disabled, but it will be hidden in the tray.
- Hide app in tray on close: By default, the app will hide in the tray when you close it. Disabling this setting will cause the app to close completely when you close it.
- Persist size and position: By default, the app will remember its size and position when you close it. Disabling this setting will cause the app to reset its size and position to the default when you close it.
- Prompt on game startup: By default, the app will prompt you to resume or create server when you launch your game. Disabling this setting will prevent that from happening.
Click to view example image
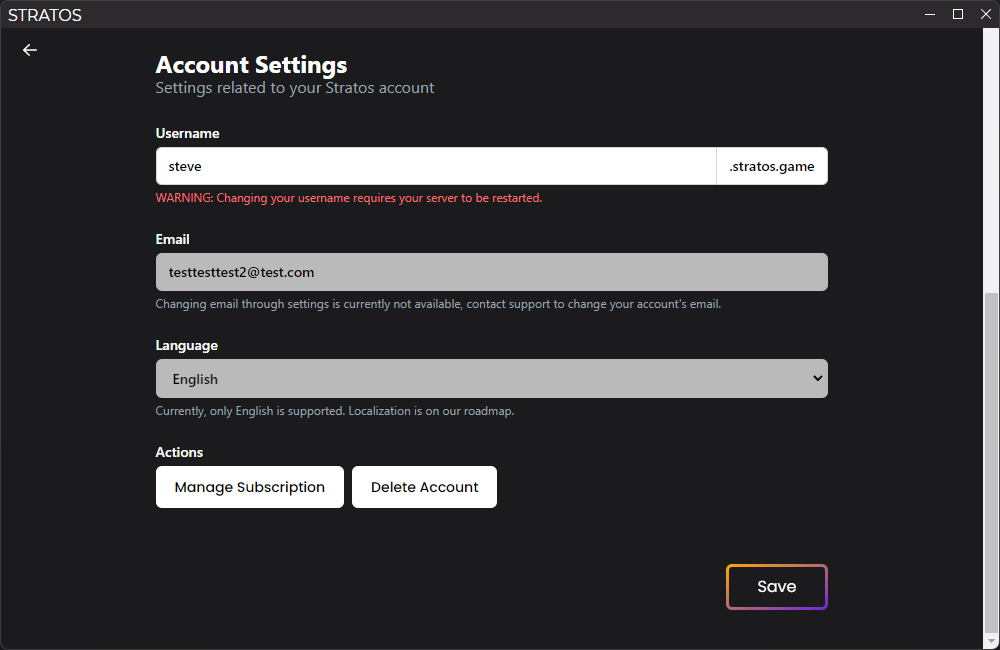
# Updating your username
We don't force you to live with the embarrassing username you chose when you were 12. You can change it whenever you want. Just click on the "Change Username" button, enter your new username, and click on the save button at the bottom of the page. If the username is available, it will be updated immediately. If it is not available, you will be prompted to choose a different one. Your username must be between 3 and 40 characters long and can only contain letters, numbers, and hyphens.
Changing your username will require your server to be restarted. This happens automatically, so make sure any players on your server are aware of this!
Click to view example image
# Managing your subscription
If you would like to change your payment information, billing information, or cancel your subscription, you can click on the "Manage Subscription" button. This will open up a tab in your browser with a Stripe billing portal. From there, you can enter your email address and you will be sent a link to manage your subscription.
Click to view example image
# Deleting your account
Should you decide to part ways with Stratos, you can delete your account using the "Delete Account" button. We will keep your information for 7 days in case you change your mind and after that, your servers and all other information will be permanently deleted.
Click to view example image