
Getting Started
Thanks for checking out Stratos! We are excited to have you give it a try. This guide will walk you through the steps necessary to get your first server up and running.
Stratos is currently in pre-release meaning that we are still working on developing core features and squashing bugs. While we are in this phase, we are limiting the number of users that can use the product. If you are interested in giving it a try, visit our home page to add yourself to our email list to be notified when you gain access.
# Downloading and Installing the Desktop Application
# Download
When you gain access to Stratos, you will receive an email that contains a download link to the app installer as well as an early access key. The early access key is necessary for completing your account set up (see below).
# Install
Launch the installer you downloaded and follow the installation instructions.1
# Using the Desktop Application
# Getting Started
When first launching Stratos, you will be greeted with a welcome page. On this page, select the "Get Started" button to begin the account creation process.
Click to view example image

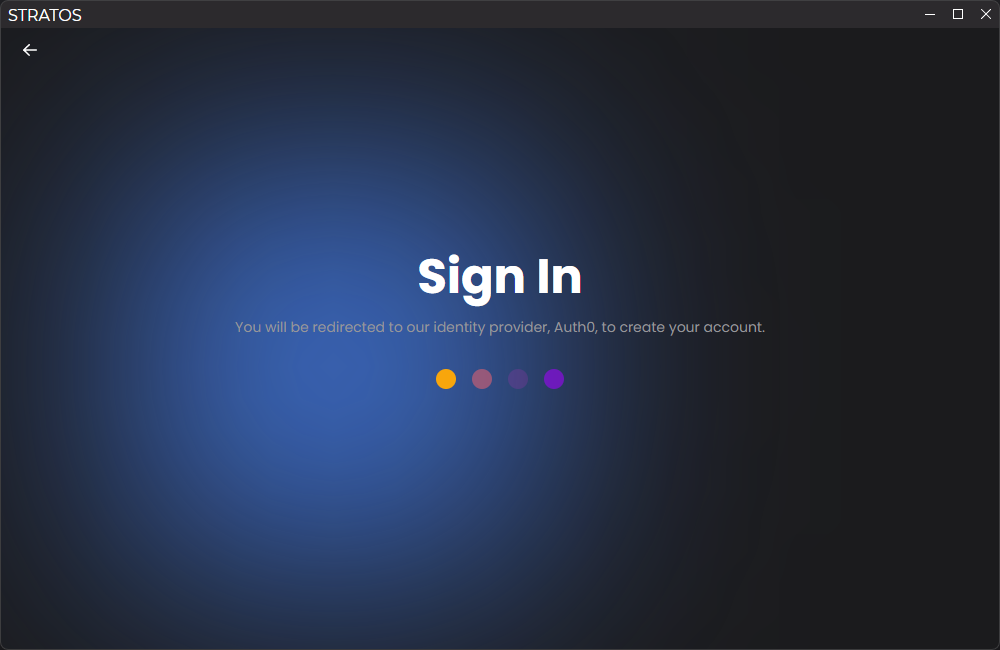
# Sign In
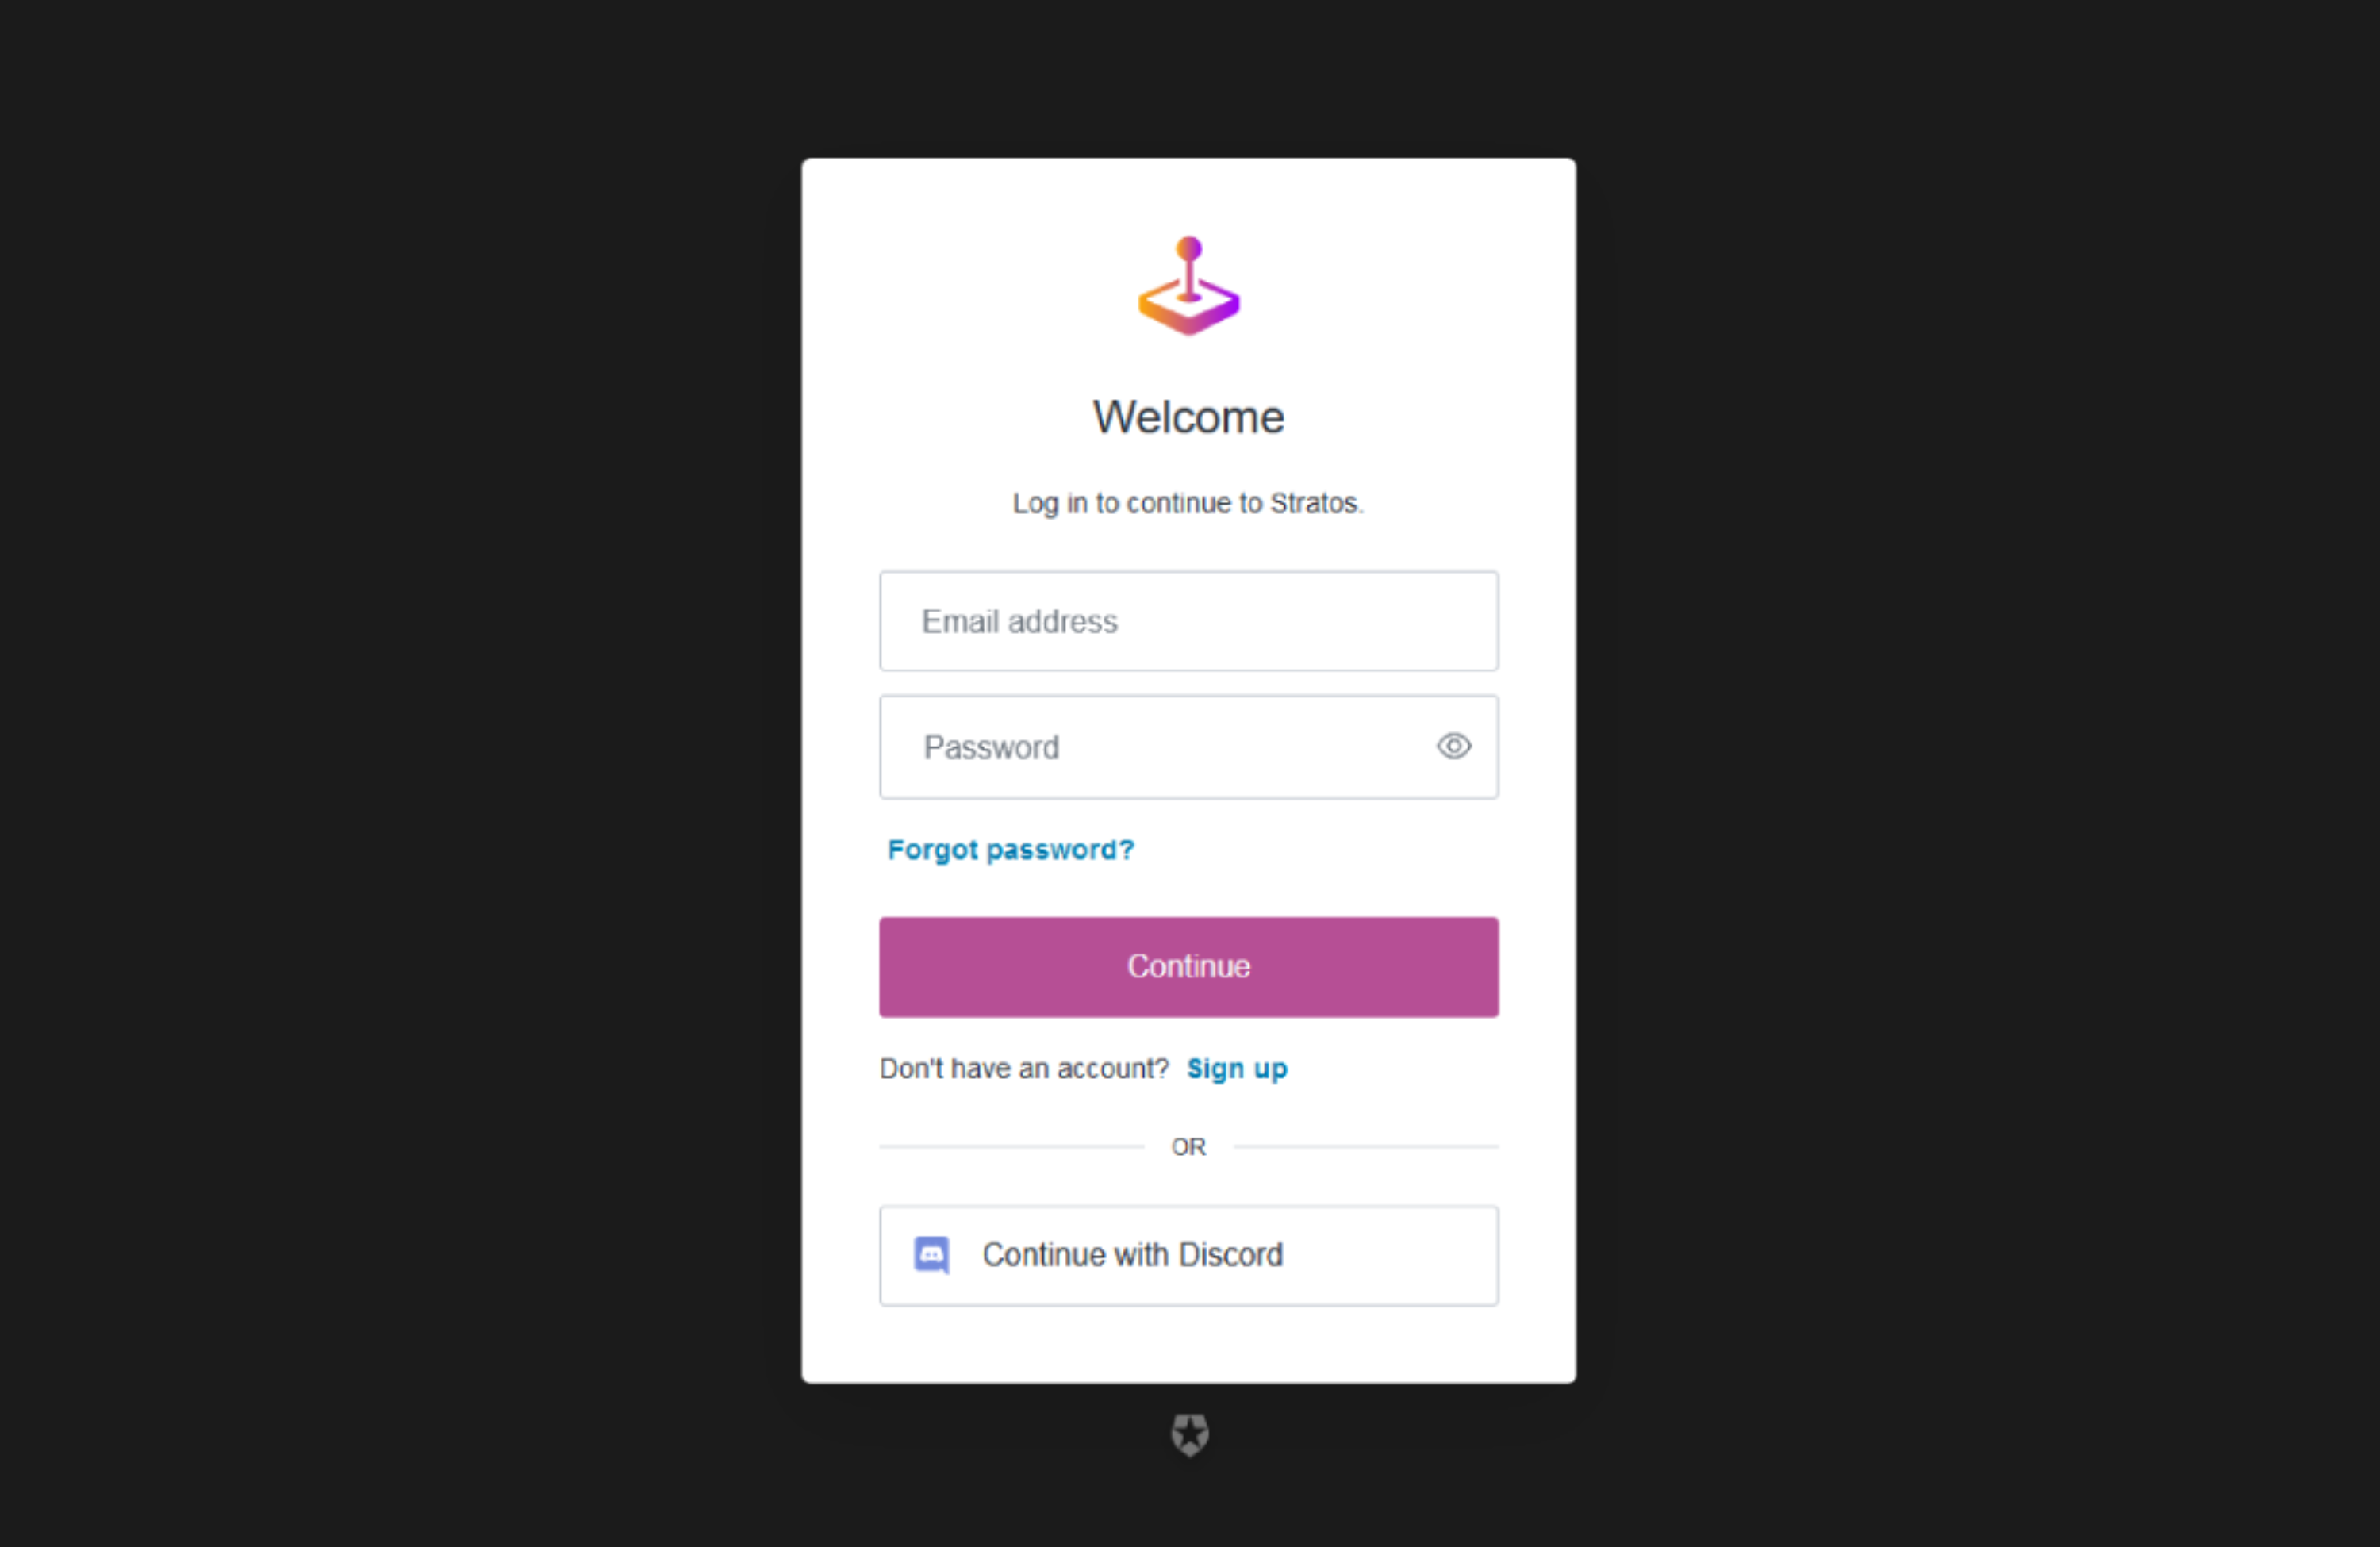
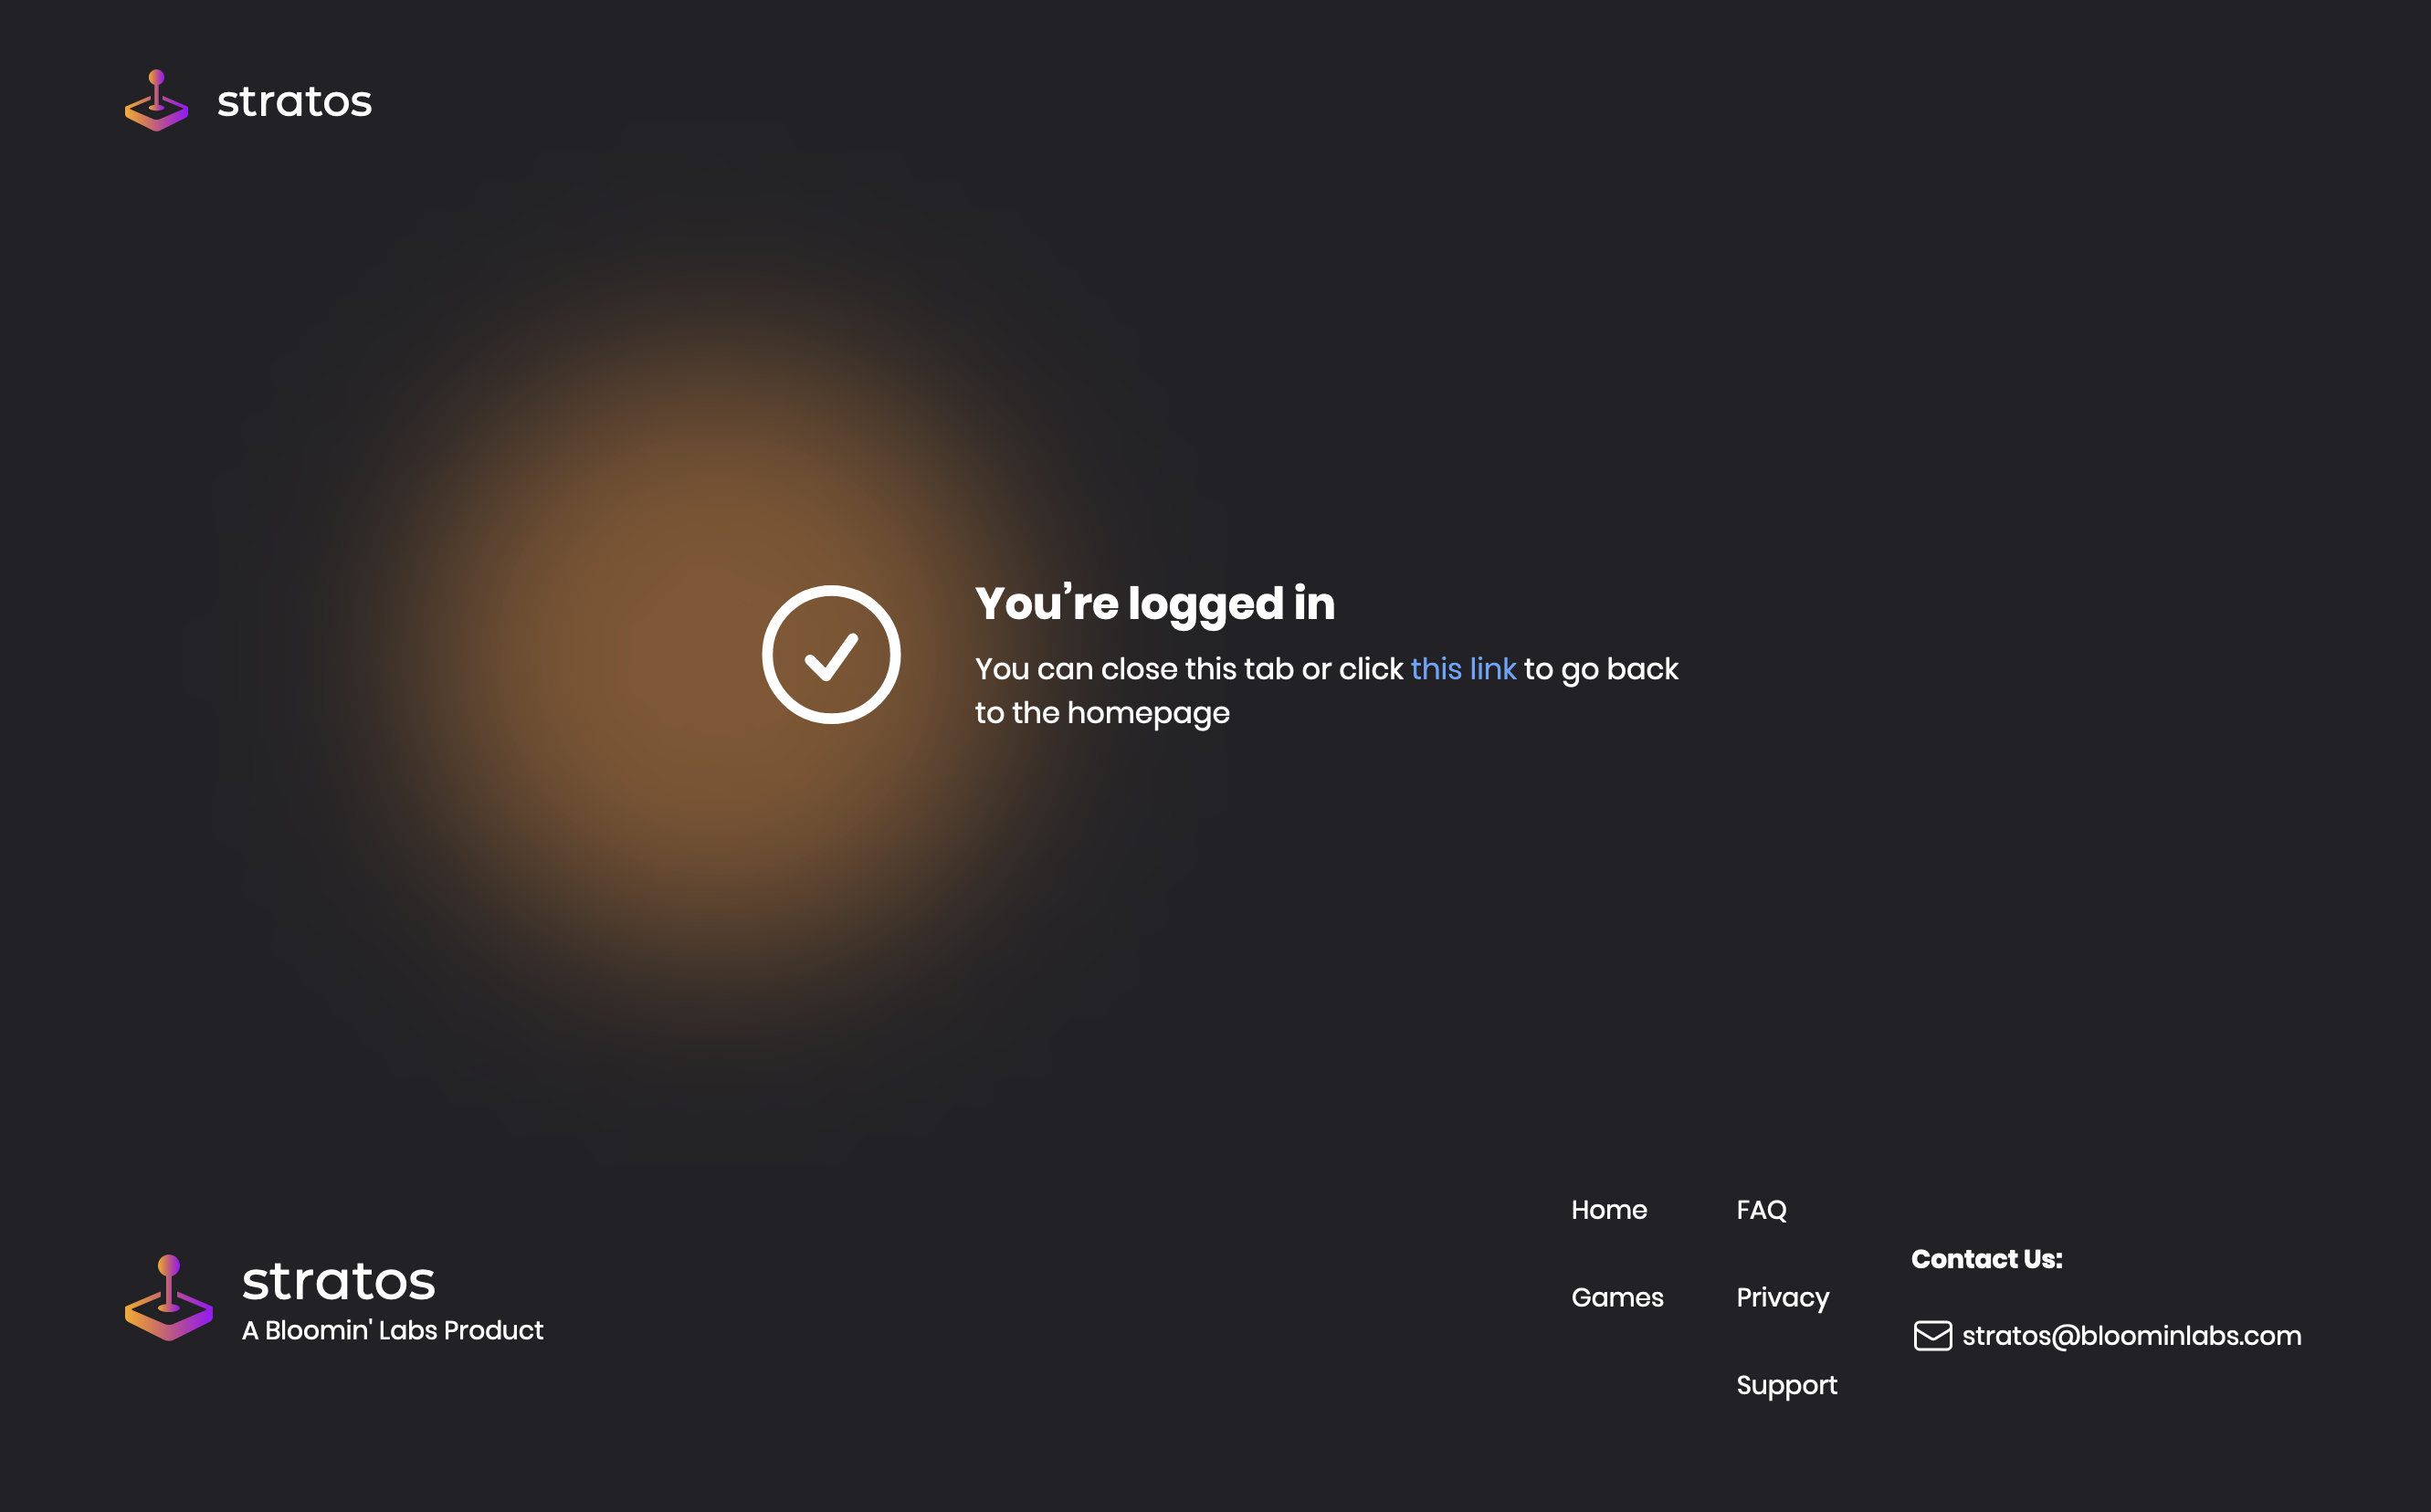
After clicking "Get Started", you will be redirected to the sign in page. This should then open a browser window where you can create an account or sign in to an existing account using our authentication provider, Auth0.
When creating an account, you can choose between using email and password or single sign-on (only Discord is supported right now). We suggest using Discord to sign in as it is the easiest option and will allow for some cool features in the future.
Click to view example images
Sign in page in the app:
Sign in/create account form in the browser:
Successful sign in page in the browser:
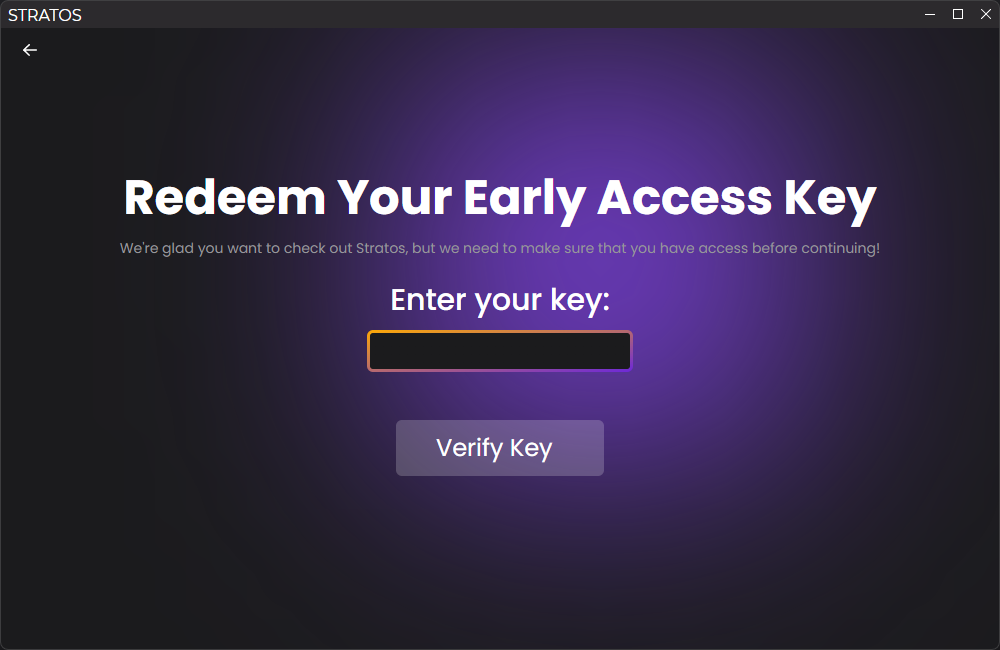
# Redeem Your Early Access Key
After successfully signing in, you should be redirected back to the app. If you are not redirected, click the link on the page to return to the app. Once there, you will be greeted with a prompt to enter your early access key. You should have received this key in the email sent by stratos@bloominlabs.com that you received when you gained access.
Redeem your early access key page:
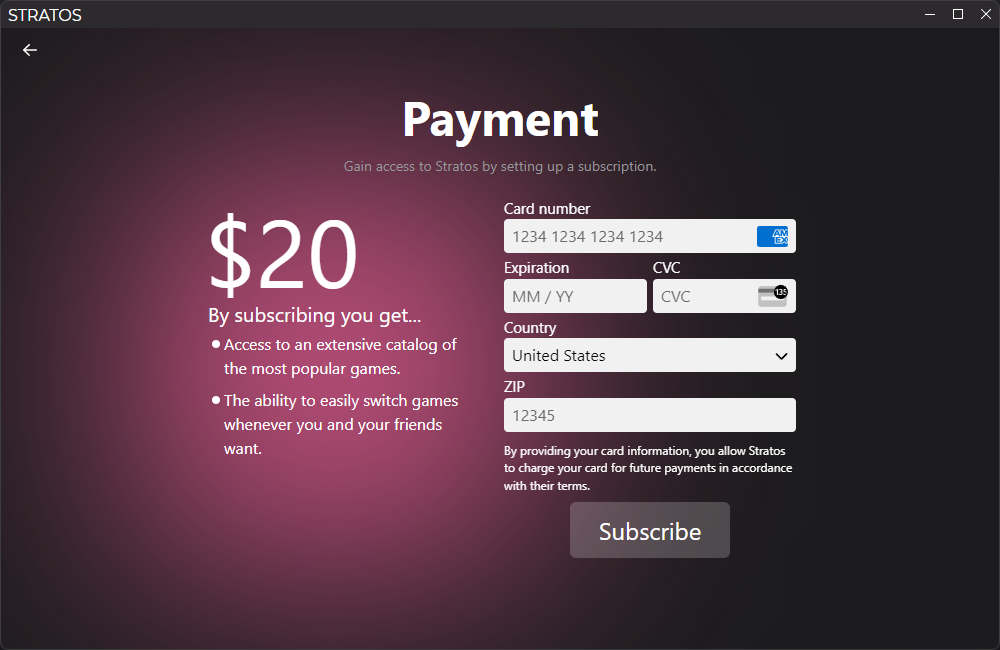
# Payment
The next page will prompt you to enter your credit card information since Stratos is a paid service and requires a monthly subscription to use. Payment is handled by Stripe, a third-party payment processor (meaning we do not store any of your credit card information on our servers).
Payment page:
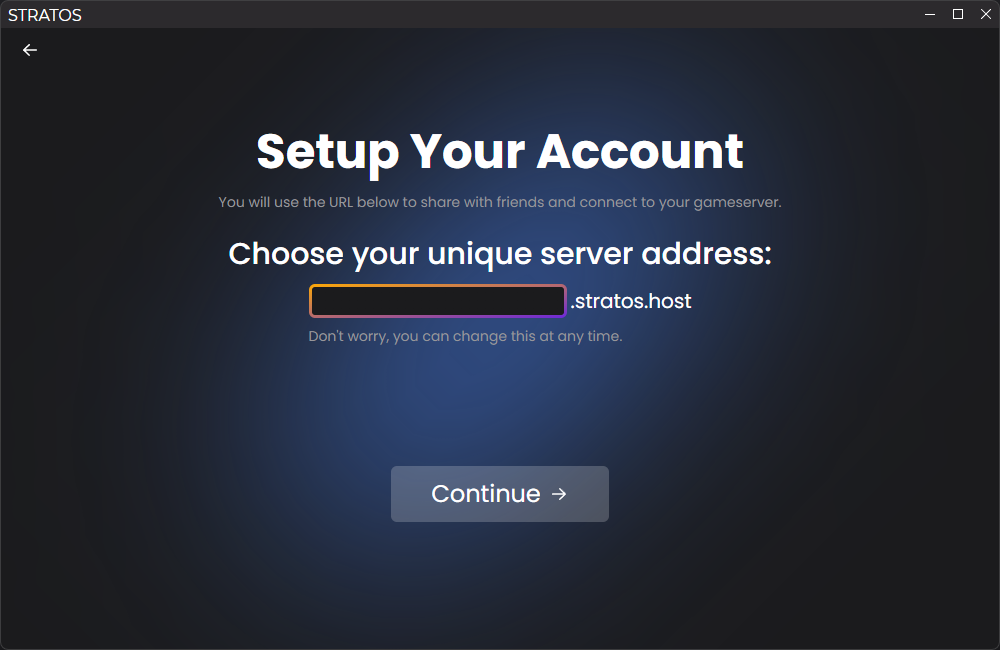
# Choose a Username
After your payment is processed, you will be prompted to choose a username. This username will be used to share your server with others so choose wisely!2
Choose username page:
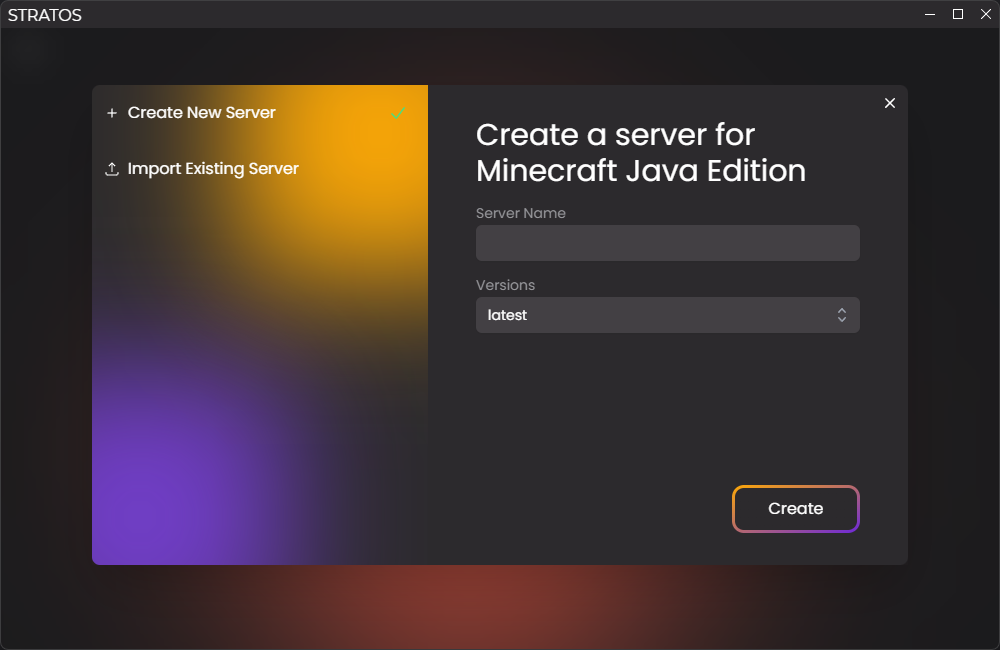
# Creating Your First Server
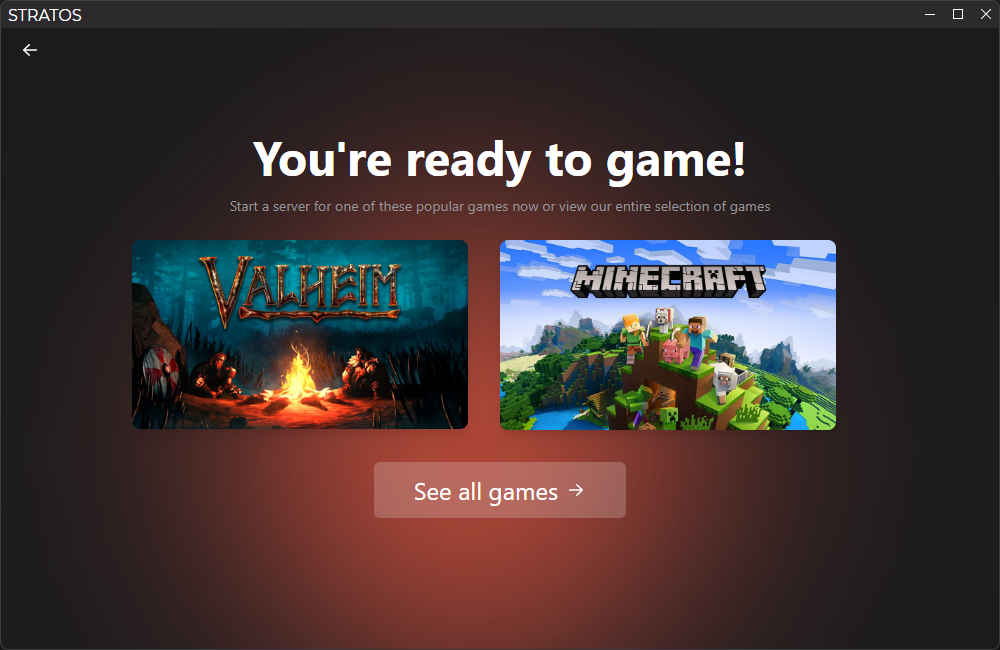
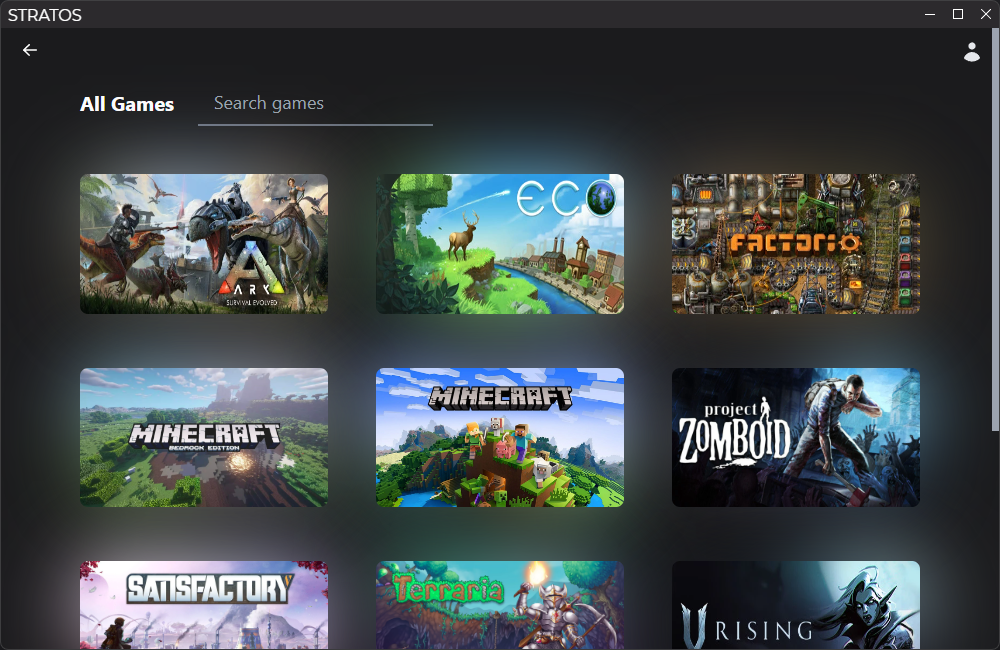
Congrats! You are finally ready to create your first server and you should now see a page with two games. If either are the game you'd like to start a server for, click on the image to get the server creation modal to pop up. If you'd like to create a server for a different game, click the "See all games" button to view our full catalog.
After clicking on a game, you will be presented with a modal that will allow you to configure your server where you will be able to choose the server name and the version.3 Once you've configured your server, click the "Create Server" button and you will then be redirected to the home page to view the status of your server.
Click to view example images
Ready to game page:
All games page:
Create server modal:
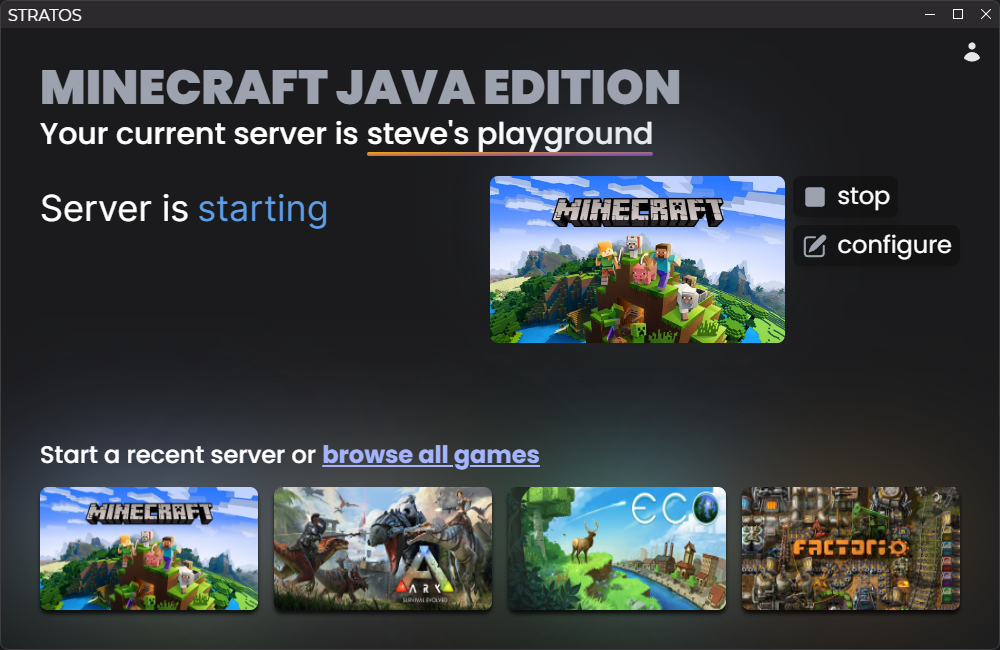
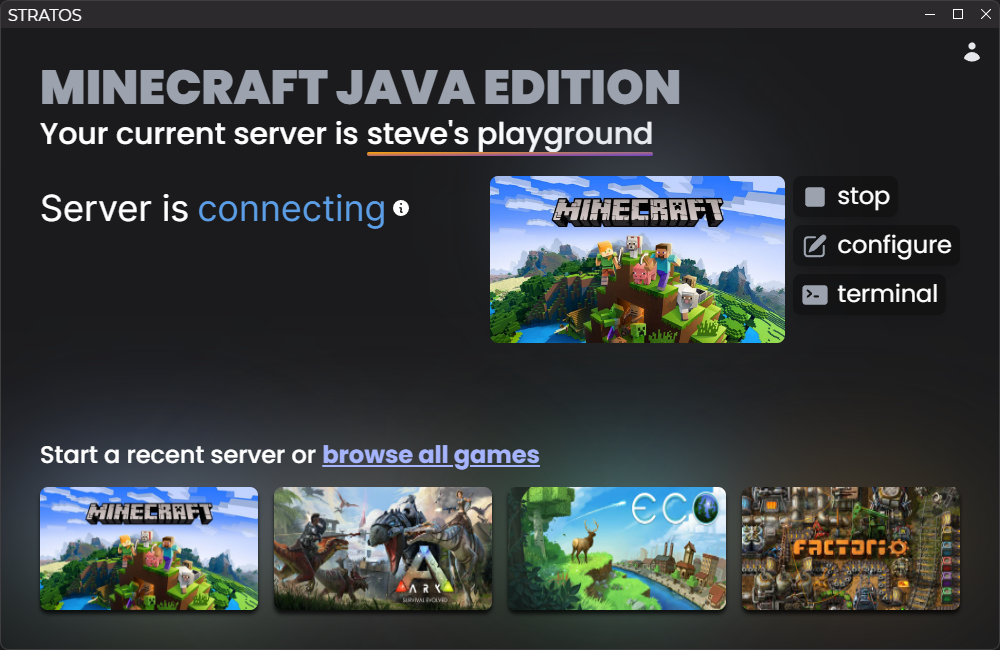
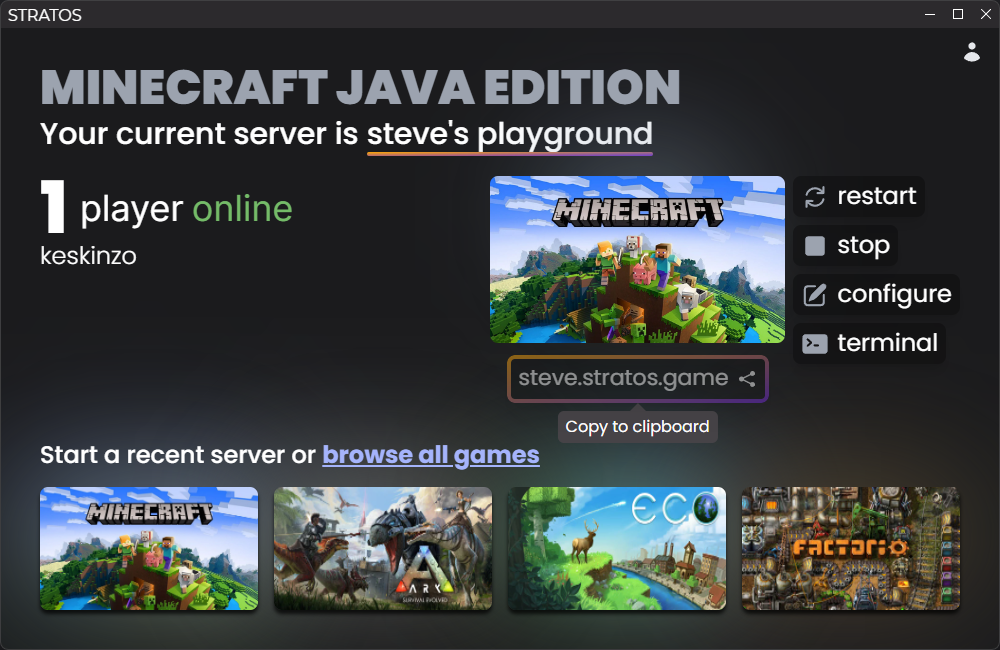
# Monitoring and Controlling Your Server
Now that you've got your first server up and running, you will be able to monitor and control it from the home page. Your server will change status as it starts up and you will have different controls available to you depending on the status of your server.
- Starting: We are still working on getting your server running. Actions: stop the server, configure the server files.
- Connecting: Your server is running but users are not able to connect. Actions: stop the server, configure the server files, view the server terminal.
- Online: Players can now join your server. Actions: stop the server, configure the server files, view the server terminal, see the players currently connected to the server, a button to share your server URL is available.
- Stopping: Your server is in the process of shutting down. Actions: start the server, configure the server files.
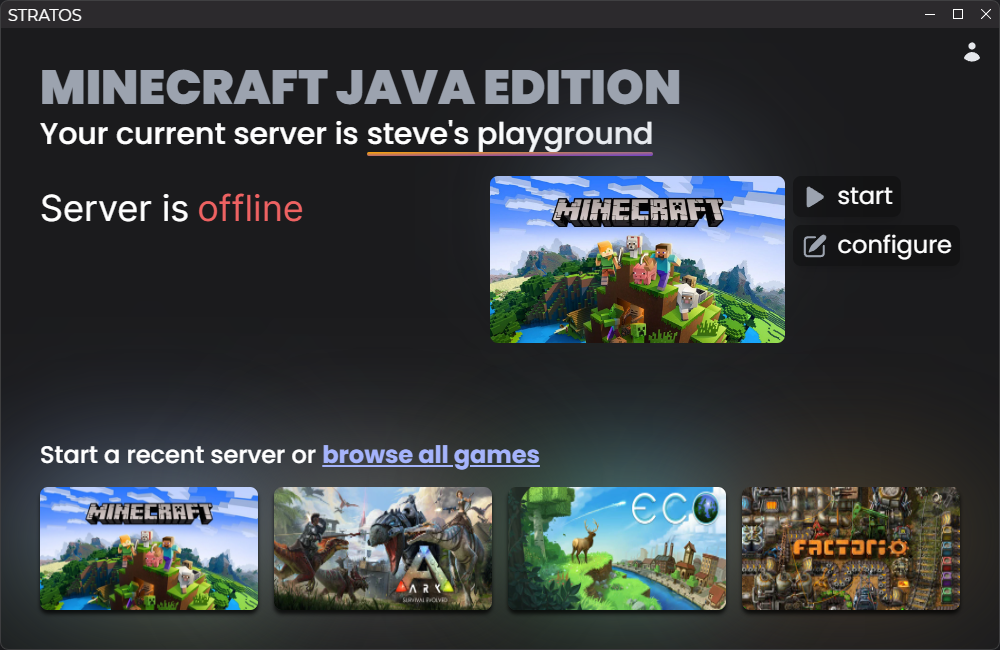
- Offline: Your server is not running. Actions: start the server, configure the server files.
Click to view example images
Home page (server starting):
Home page (server connecting):
Home page (server online):
Home page (server offline):
# Next Steps
All that's left is to copy and share your server URL and you're ready to game with your friends! For more tips on advaned usage of the app such as configuring your server files, access your server's console, and more, check out our advanced usage guide.
| 1. | Stratos is currently only supported on Windows. Other platforms will be supported in the future. ↩ |
| 2. | You will be able to change your username at any time from within the app. ↩ |
| 3. | We also support importing existing servers. Check back in later for a guide on how to do that. ↩ |